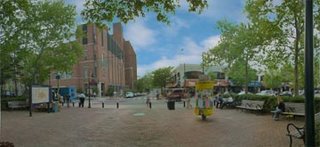
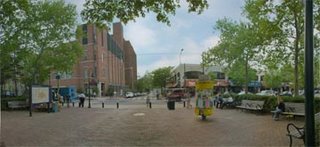
 It's a mini-panorama of 40th and Locust Streets in Philadelphia. The photo is mediocre, I suppose, but it definitely demonstrates the problem with the sky. Now in this particular photo, I have a second problem: lots of trees and tiny little gaps between the trees through wich you can see the washed-out sky.
Here is a photo of a nice sky I took, and then stretched to match the dimensions of my main photo:

So next I took the sky and put it on its own layer behind the main photo. So how to I make the sky shine through in all the right places?
One thing I could do is to use Select-->Color Range on the top layer to select the washed out sky colors, and then delete them or make them transparent with a layer mask so that you can see the sky underneath. But it's very time consuming, plus you inevitably select parts of the photo you don't want to, or vice versa--leave parts unselected that should be showing sky behind them. So that's not the ideal solution here.
Instead, I used a layer blending mode to achieve my desired result. (I don't know much about blending modes, and I'm trying to learn more about them. Most of them remain very confusing, still.) In this photo, I took the top layer and changed the blending mode to "Darken". What this does (i think) is displays the darker layer. So in the parts of the photo where the top layer is darker, you see the top layer, and where the bottom layer is darker (ie. the sky) you see the bottom layer. Since the sky is washed out white in the top layer, everything on the bottom layer shows through in those parts. And since the top layer is darker almost everywhere else, you see the top layer. Here is the result:

Clearly the sky looks unnatural now, but you can see that the overall effect we were after has been achieved, and there are bits of blue sky showing between the branches and the leaves. The last step is to take the layer containing the blue sky and drop the opacity down. I lowered it down to 45% and here's the final photo:

Not too shabby. One caveat: this technique depends on the "important" parts of the top layer being darker than the bottom layer. There were actually a few spots where the top was extremely light, and the blue sky showed through in those areas. There are two ways to solve this: Erase the parts of the sky layer that are directly under the lightest parts of the foreground layer, or create a layer mask on the sky layer and paint black over those same parts (this is probably the preferable method since it's non-destructive). I didn't show you that step above, but trust me, I did it when you weren't looking. :)
So here are all the steps listed. You can take the first two photos above and try this yourself to see how it works.
| 1. Open a new Photoshop document containing the photo of the sky. (Save it to your computer and then just open it in Photoshop) 2. Copy the photo of 40th street and paste it into your existing document. You should now have a document containing 2 layers: the sky on the bottom layer and 40th Street on top. 3. Click on the top layer, and change the blending mode from "Normal" to "Darken". You should immediately see the blue sky show through. 4. Click on the bottom layer and change the opacity from 100% to 45% (or whatever percent you like). That's it! You're done! Now just save it in whatever format you like. |
.

No comments:
Post a Comment